

We use cookies to improve your experience when using our site. For example, cookies will help us remember you and will assist us in showing you content we think you'll be interested in. To find out more, read our Privacy Policy
To apply for careers, cookies are necessary for the applications to run properly. Please accept cookies for processing your information. Rest assured, your information will not be shared.
By clicking "OK", you consent to our use of cookies
For a majority of the year, reindeer roam the world without much ado. Then, when the holidays hit, we enter peak reindeer-mania as families sing holiday jingles about the antlered creatures, and we envision them taking to the night skies to help Santa Claus navigate his trek across the globe.
You could say we caught a bit of that mania too, which is what led us to create a dessert that married some of our favorite things — ice cream cones and Santa’s notable holiday helpers.
We often associate the holidays with winter weather, an assortment of gifts, and plenty of food. This time of year is also well-suited for creating holiday memories with your children. Consider these reindeer ice cream cones a fun way to connect with your children or grandchildren over an adorable, easy-to-assemble snack.
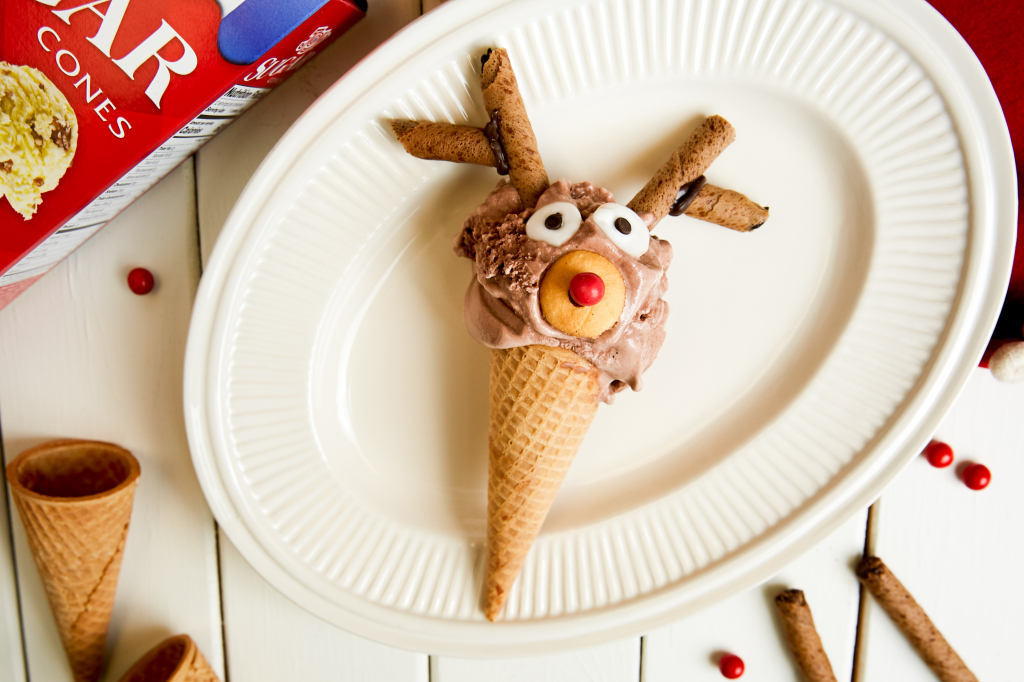
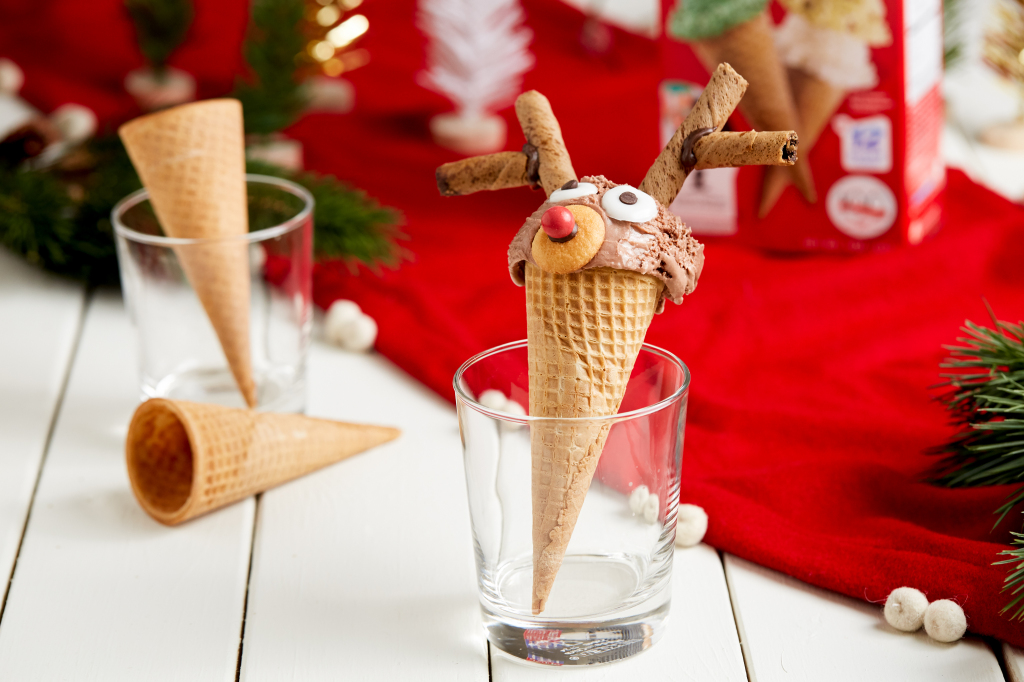
This kid-friendly ice cream cone treat makes for a fun craft while the kids are out of school on holiday. Plus, it’s perfect if you don’t quite know your way around a kitchen, as minimal assembly is required. The most difficult part? You’ll mix four ingredients to create homemade reindeer eyes.The soft, yet crunchy, chocolate wafer sticks make the perfect reindeer antlers. Then, a mini cookie is the landing spot for the reindeer’s red nose, while a sugary paste joins mini chocolate chips to make up the eyes. All in all, it’s as fun to assemble as it is to eat!

Prep time: 75 minutes
Serves: 4
Whether you’re in the holiday spirit or need to whip up a dessert for a party, we’ve got you covered. Here are some of our favorite holiday recipes:
Stay connected with us through our e-newsletter. Share your favorite JOY Cone creations with us on Facebook and Instagram using #BringJoyHome and you could be featured on our social media pages!
Top
Recent Comments