Ice Cream Cone-Themed Treats for Santa


Posted on December 12, 2019

While Santa Claus and his reindeer are flying all over the world on that one special eve this month, they’ll likely be treated to all sorts of national delicacies.

In Australia, children leave Santa a beer to kick off his long trek around the globe. In Sweden, children offer up a cup of coffee to keep the big guy awake (it is a terribly long journey, after all). In the United Kingdom, mince pie is the nourishment of choice for the once-a-year visitor. Here in the United States, Santa and his crew might get their fill on chocolate chip cookies and milk (with a side of carrots for the reindeer).

Although Santa likely receives a wide variety of snacks throughout his journey, we’re betting he rarely sees these ice cream cone-themed treats featuring JOY Cones that we’ve assembled below. All feature simple recipes and easy-to-follow instructions, making them perfect for involving small children in the process.

What better way to say “thank you” to the man in red than by gathering the family to bake, ice, and decorate these unique welcome gifts and give Santa something a little unexpected — something with a little more Joy — this year.

Sugar Cone Santa Hat Cupcakes

Imagine how tickled Saint Nick will be to see you’ve made edible replicas of his iconic hat. He’s pretty attached to that thing, seeing as he’s made it a staple of his wardrobe since, well, 280 A.D., when he first appeared on the scene as the monk named St. Nicholas.

Our recipe makes 24 hats, which means you could set a few hats aside to treat your family and friends or send them to your child’s school as a holiday thank-you for teachers.

Here’s what you need to construct these miniature Santa hats:

  • 24 JOY Sugar Cones (2 boxes)
  • Vanilla cake mix – typically requires water, 3 eggs, and a ½ cup of cooking oil
  • Red cupcake baking cups
  • 1 cup butter, softened
  • 1 teaspoon vanilla extract
  • 4 cups powdered sugar
  • 2 tablespoons milk
  • 1 cup red candy melts
  • Red sparkling sugar
  • Piping bag (a zip-top bag works great, too)
  • Star piping tip

Follow these instructions to create your Santa hat cupcakes:

  1. Prepare the cupcakes according to instructions on the box and set aside to cool.
  2. To make the icing, gather a large bowl and cream the butter using a stand mixer (or by hand works well, too) and add vanilla extract.
  3. One cup at a time, incorporate the sugar into the mixture.
  4. Beat in milk, mixing until fluffy.
  5. If you’re using a zip-top bag to pipe the trim and pompom, snip off a small corner of the bag with scissors and insert a star tip into the inside of the bag, securing it just inside the area in which you cut. Ensure the end of the piping tip is outside of the bag. Next, transfer icing into your piping bag that features a star tip, or your fully assembled zip-top piping bag, and squeeze out air before securing closed.
  6. Add candy melts to a microwave-safe bowl and heat for 30 seconds, stirring and repeating until fully melted.
  7. Roll each sugar cone in the melted candy until fully coated.
  8. Place coated cones on a baking rack and sprinkle with sparkling sugar.
  9. Ice each cupcake and place one cone rim-side-down on top of each cupcake.
  10. Pipe icing around the rim of each cupcake and pipe a pompom at the very tip of the cone.

Sugar Cone Holiday Trees

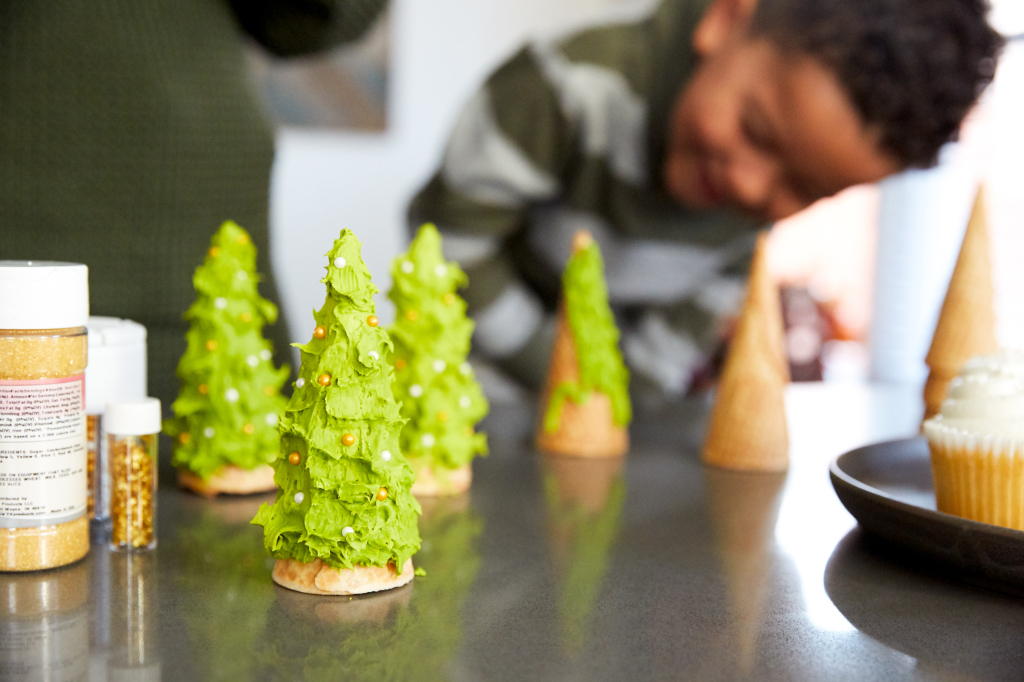
Here’s your chance to turn your countertop into a winter wonderland as you await the arrival of Santa Claus. Our holiday tree crafts are edible while fresh, and perfectly durable as decorations after a day or so (the icing tends to harden, making them pretty sturdy around-the-house decor).

Santa will admire the craftsmanship of these vibrant conifers that even small children can easily assemble. Plus, if you don’t want to leave them all out for Santa, you can landscape your homemade gingerbread houses by adding a pine tree forest.

The piping bag isn’t necessary to make the trees as shown, but what child can resist playing baker for a day with all the right tools of the craft?

Here’s what you need to make these tiny holiday trees:

  • 12 JOY Sugar Cones
  • Vanilla cake mix – typically requires water, 3 eggs, and a ½ cup of cooking oil
  • Cupcake baking cups in your favorite festive color
  • 2 16-ounce cans vanilla icing
  • 1 ½ cups powdered sugar
  • Green food coloring
  • Edible small pearl candies
  • Edible star candies
  • Piping bag or a butter knife

Follow these steps to assemble your mini holiday trees:

  1. Prepare the cupcakes according to instructions on the box and set aside to cool.
  2. In a large bowl, mix icing and powdered sugar until sugar is completely incorporated.
  3. Ice the cooled cupcakes.
  4. Tint the remaining icing with green food coloring (we used several drops to get the bright green hue) and ensure food coloring is completely incorporated into icing.
  5. If you’re using a zip-top bag, snip off a small corner of the bag with scissors and insert a star tip into the inside of the bag, securing it just inside the area in which you cut. Ensure the end of the piping tip is outside of the bag. Next, transfer icing into your piping bag that features a star tip, or your fully assembled zip-top piping bag, and squeeze out air before securing closed.

  1. Pipe icing in short bursts all over the cone to create your own unique designs, or cover the cone fully in icing and use a butter knife to pat the icing, causing the icing to form tree-like points all over the cone (as we did).
  2. Sprinkle glitter, edible pearl candies, edible shining stars, or your decorations of choice all over the trees while the icing is still fresh and soft.
  3. Place one cone rim-side down on each cupcake and arrange them for Santa’s arrival!

Ice Cream Sundae Cookies

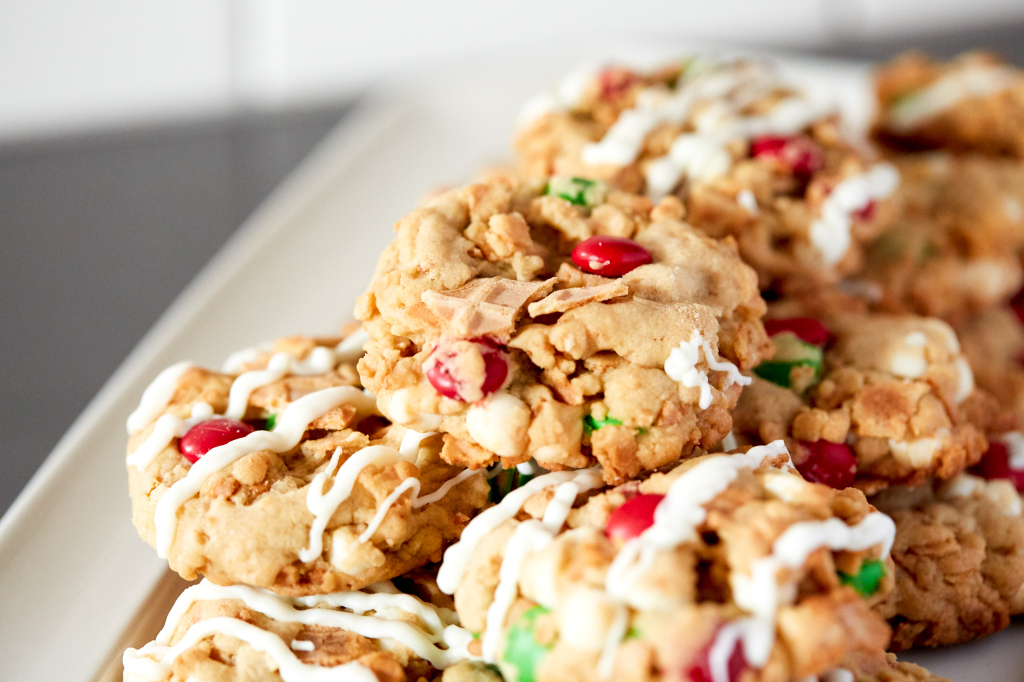
Fans of chewier cookies appreciate recipes like our sugar cone cookies and these ice cream sundae cookies, which feature JOY Cones in the cookie base. When incorporated into cookies, the ice cream cones make for a dense and delicious treat that will not only please the whole family, they’ll earn you a spot on Santa’s nice list this year.

These are the perfect cookies to accompany your children’s letters to Santa and a big ol’ glass of milk for jolly old St. Nick.

Here’s what you need to make them:

  • 2 cups coarsely crushed JOY Waffle Cones (about 6-8 cones)
  • 1 ⅓ cups flour
  • ½ cup butter, room temperature
  • ¾ cup light brown sugar
  • 1 egg
  • 2 teaspoons vanilla
  • ½ teaspoon baking soda
  • ½ teaspoon salt
  • 2 cups white chocolate chips, separated
  • ¾ cup red and green candy-coated chocolates

Now that you have all the supplies, follow these steps to bake your ice cream sundae cookies:

  1. Preheat oven to 350°.
  2. Line baking sheet with parchment paper.
  3. In a large bowl, cream butter and sugar using a stand mixer or hand held whisk until fluffy.
  4. Add egg and vanilla and mix until incorporated.
  5. Add salt, baking soda, and flour until dough forms (if you’re using a stand mixer, make sure your speed is set to low for this step).
  6. Using a large spoon, fold in crushed waffle cones, 1 cup white chocolate chips, and candy-coated chocolates.
  7. Using a spoon or ice cream scoop, drop dough onto lined pan. Press down on each cookie with your palm or a large, flat kitchen utensil to flatten into a cookie shape.
  8. Bake for 8-9 minutes until edges are slightly golden.
  9. Transfer to a wire rack to cool.
  10. In a microwave safe bowl, place 1 cup white chocolate chips and microwave for 30 second-increments until chocolate is completely melted. Be careful with this step if you have young children helping you.
  11. Add melted chocolate to a zip-top bag, snip off the tip of the bag, and pipe the chocolate on top of the cookies.

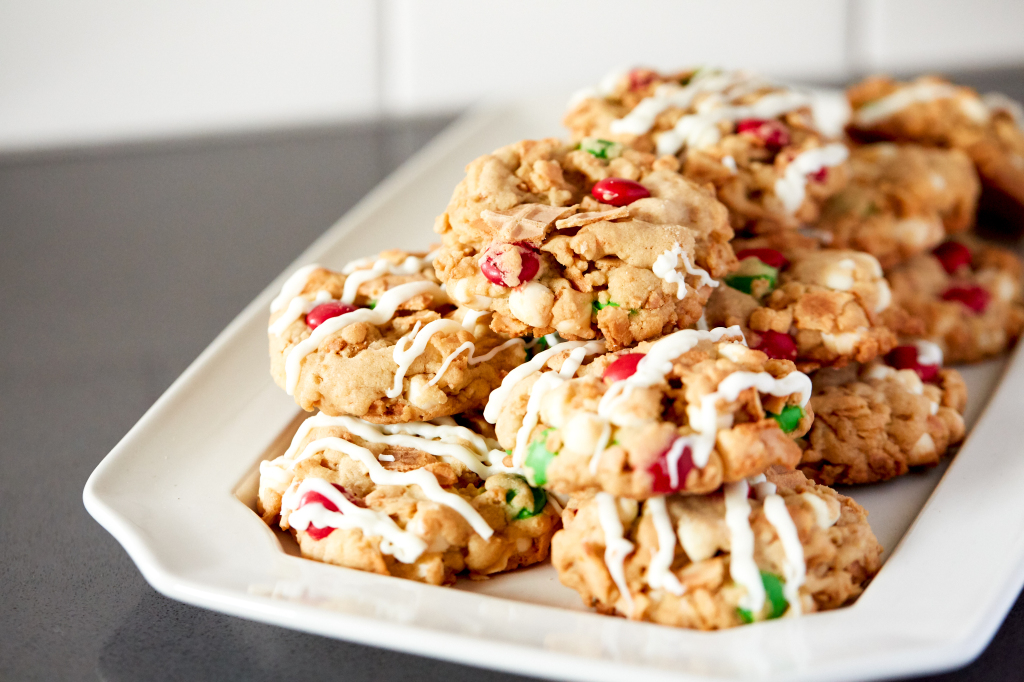
Once your cookies are picture perfect, stack them on a plate alongside your note for Santa and eagerly await his visit. You’re sure to get everything on your holiday wish list after he gets a taste of these Joyful cookies!

Want the scoop on everything JOY? Sign up for our newsletter for all the latest news and discounts! Help us spread the Joy — follow us on Facebook or on Instagram at @joyconeco.

Back to top icon

Top