

We use cookies to improve your experience when using our site. For example, cookies will help us remember you and will assist us in showing you content we think you'll be interested in. To find out more, read our Privacy Policy
To apply for careers, cookies are necessary for the applications to run properly. Please accept cookies for processing your information. Rest assured, your information will not be shared.
By clicking "OK", you consent to our use of cookies
When it comes to holiday decorations, the ones we make with our loved ones tend to hold the most cherished memories. If you’re looking to spend more quality time with family, and get creative with some quirky DIY holiday crafts, consider incorporating JOY Cones into the mix for some sweet, ice cream-inspired ornaments and games.
These activities are traditional aspects of the holiday season and are a perfect way to #BringJoyHome by using ice cream cones in unexpected ways.
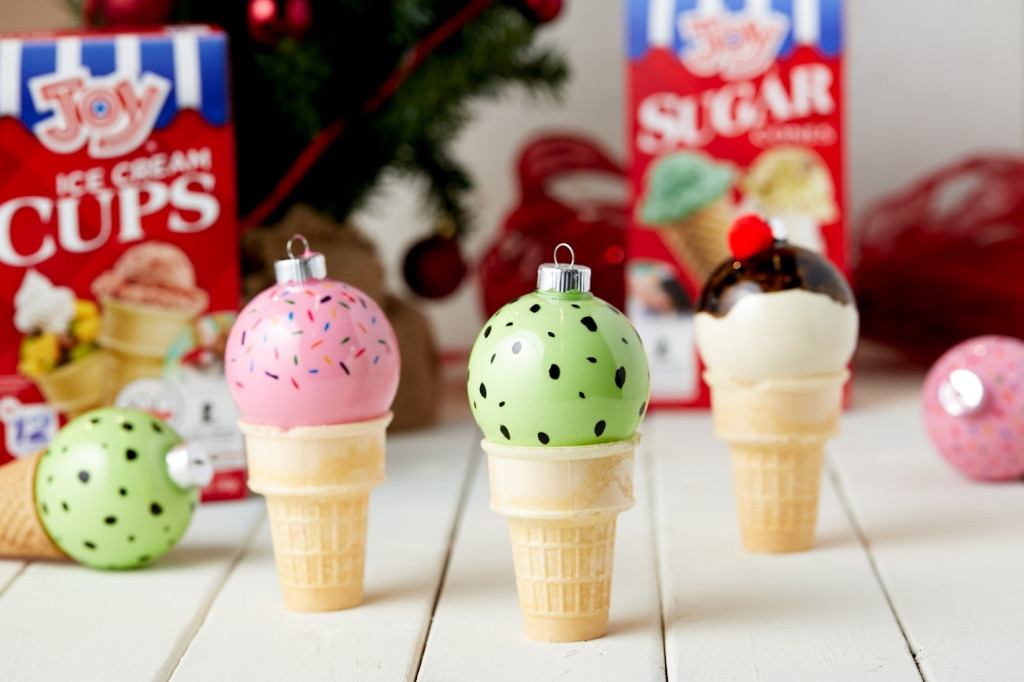
Is your family full of ice cream fanatics? Are you looking for something fun and funky to spruce up your tree this season? Then this holiday craft is for you. You’ll create unique ornaments that look like perfect ice cream cones, but they’re definitely too cute to eat.
You’ll need:
To get started, carefully remove the metal tops from the clear bauble ornaments. Gently squeeze paint into the bauble, then make sure to cover the opening completely with your finger before you shake the bauble all around. Once the inside of the bauble is fully covered, pour the excess paint onto scrap paper or into a wastebasket, and set the bauble in a safe place to fully dry.
Once the inside has dried, it’s time to create a wonderland of toppings on the outside of your ornaments. Use the black marker to create delicious-looking chocolate chips or the brown marker to create a chocolate coating on the scoops.

On the baubles that don’t have any chocolate toppings, add rainbow sprinkles with your rainbow-colored glass markers. When all your toppings have set and won’t smudge, carefully replace the metal tops.
Next, it’s time to add the cherry on top! Heat up your hot glue gun, but don’t forget to be very careful with it. With help from the glue gun, affix red pompoms on top of some scoops and let them sit to cool and harden.
The last step is to take your JOY Sugar Cones or JOY Cake Cups and glue around the rim of the cone and secure the bauble on top. Once all your cones are assembled, let your hot glue gun cool and start hanging your ornaments all over your holiday tree!

Unless you’ve been living off the grid during the holiday season the last few years, you’ve seen the shenanigans elves get up to when they’re left alone. However, we want to show you how to create your own elf with the help of JOY Sugar Cones.
You’ll need:
Start by preparing the base of your elf’s face by painting the polystyrene ball with the skin-colored paint. You might need to let it dry and apply one or two more coats to get the look you want. Once your final coat dries, paint two white ovals for the eyes and let them dry. Next, paint your sugar cone with the red paint and set it aside to dry.
When the paint on the head is dry, use the blue, black, and red pens to finish your elf’s face. Draw the pupils and irises in around the eyes, add some eyelashes and eyebrows to suit your elf’s style, and finally sketch a cute little nose in black and a mouth with the red pen.
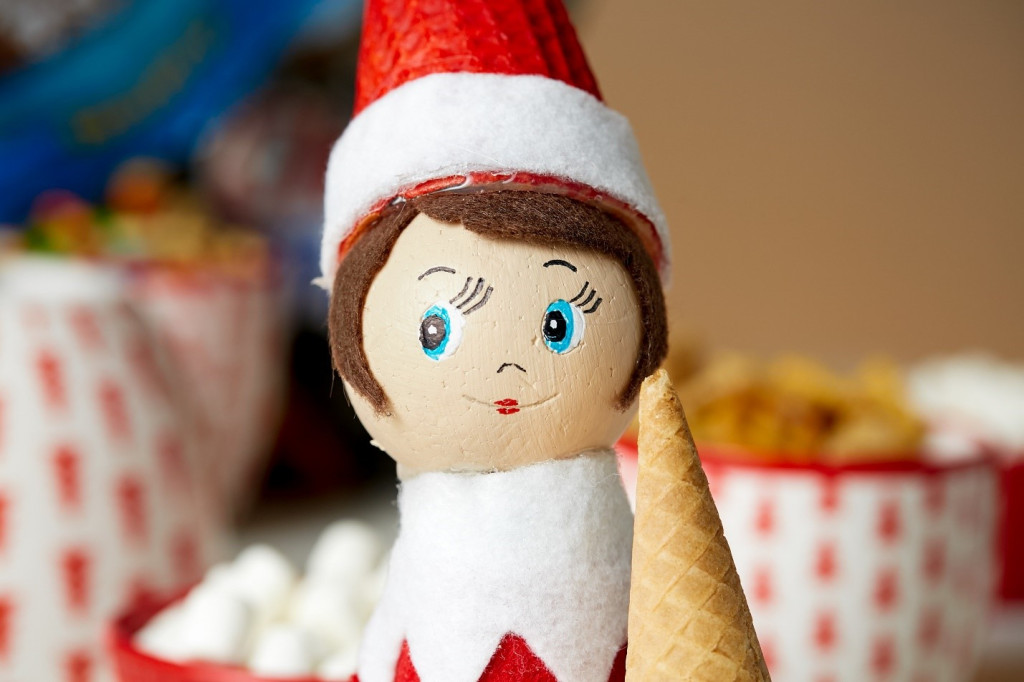
By now, you can begin creating the body of your elf. If you choose to taper the tube at one end to make a neck for your elf, follow this step: At the rim of the tube, indent the tube with one finger and create a small fold. Then, using your other hand, pinch the tube together and use hot glue to fasten it into a narrower opening.
While the hot glue is cooling and hardening for your elf’s neck, use your scissors and brown felt to cut the elf’s hair. We suggest cutting these in three pieces: two quarter moon shapes for the sides and one oval shape for the bangs. Use the hot glue to attach the hair to your elf’s head. Next, attach the elf head to the body with the hot glue gun and let it sit until all the hot glue has cooled and hardened. Finally, line the rim of your sugar cone hat (which we painted red and left to dry earlier) with hot glue and attach it to the elf head.
Your elf should be taking shape now, but it’s time to dress him/her by creating clothes from the red and white felt. Measure the cardboard tube from top to bottom, then cut a red piece of felt in the same length. Wrap the tube with the red felt and secure it with hot glue.
Using the white felt, cut a zigzag collar and a pair of white mittens. Then measure around the base of the hat and cut a section of white felt to trim your elf’s hat before securing that felt strip to the hat with hot glue.
Now use the red pipe cleaners to create arms and legs. Cut both pipe cleaners in half and glue two pieces under the white collar where the shoulders would be to create the arms. Then glue two pieces under the bottom of the tube to create the legs. Fold the middle of the bottom pipe cleaners so your elf can sit with bent legs, then bend the tips of the bottom pipe cleaners to create little feet for your elf. Now glue the white mittens to the top pipe cleaners to create the hands.
But wait! You can’t have a brand-new cone elf and not have exciting rules for how to enjoy it, right? You and your family can make up “house” rules for your elf, but we have a few ideas to help get you started.
Whether your elf shows up the day after Thanksgiving or on Dec. 1, why not reward the person who finds the elf each day with a small treat? Then, wouldn’t it be fun to keep track of which person wins the most days and give them a big reward? We suggest letting them choose what the family has for breakfast after Santa’s big visit.
If you have older kids, you might let them help choose your elf’s adventures for the younger kids so the whole family can get involved.
Whatever rules you choose, your new elf will be a bonding experience for years to come.
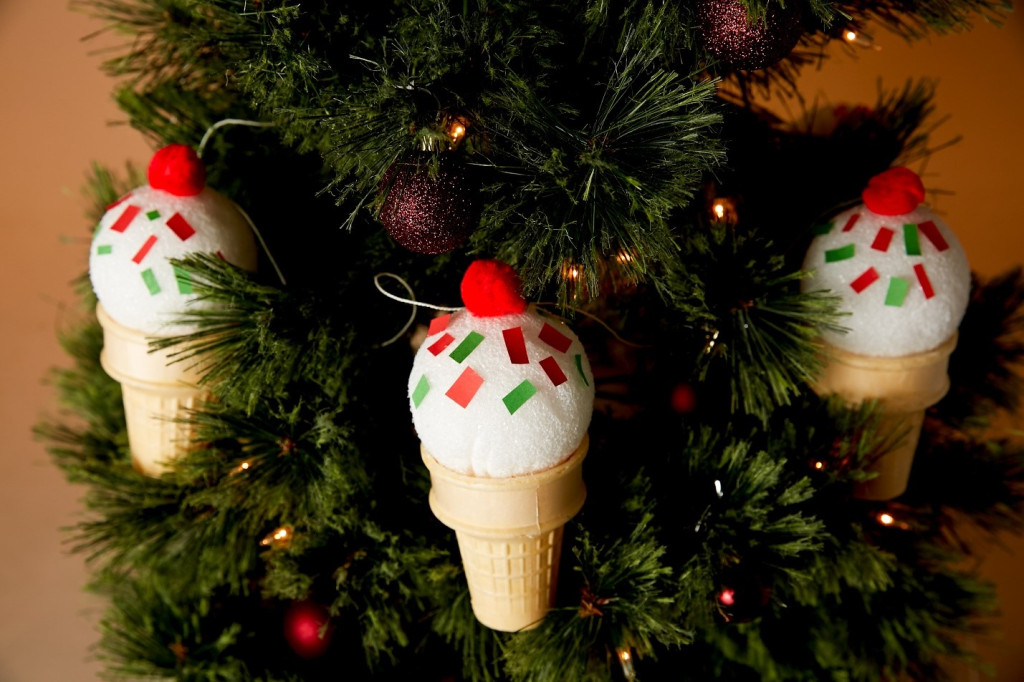
Enjoy a simple do-it-yourself craft project to highlight your love of ice cream cones by creating a sweet garland that you can hang for a Joyous occasion. Decorate the faux ice cream cone garland with colored sprinkles to match all your favorite holiday decorations.
You’ll need:
Start by cutting your string, ribbon, or twine to the length of garland you want to create. Then, decide how far apart you want each of your ice cream cones to be and mark it with a marker. Heat up your glue gun first, and once it’s ready, apply glue around the inside rim of your first JOY Cake Cup. Fit the first polystyrene ball onto the rim of the cake cup. Repeat this process until all your treats have been created.
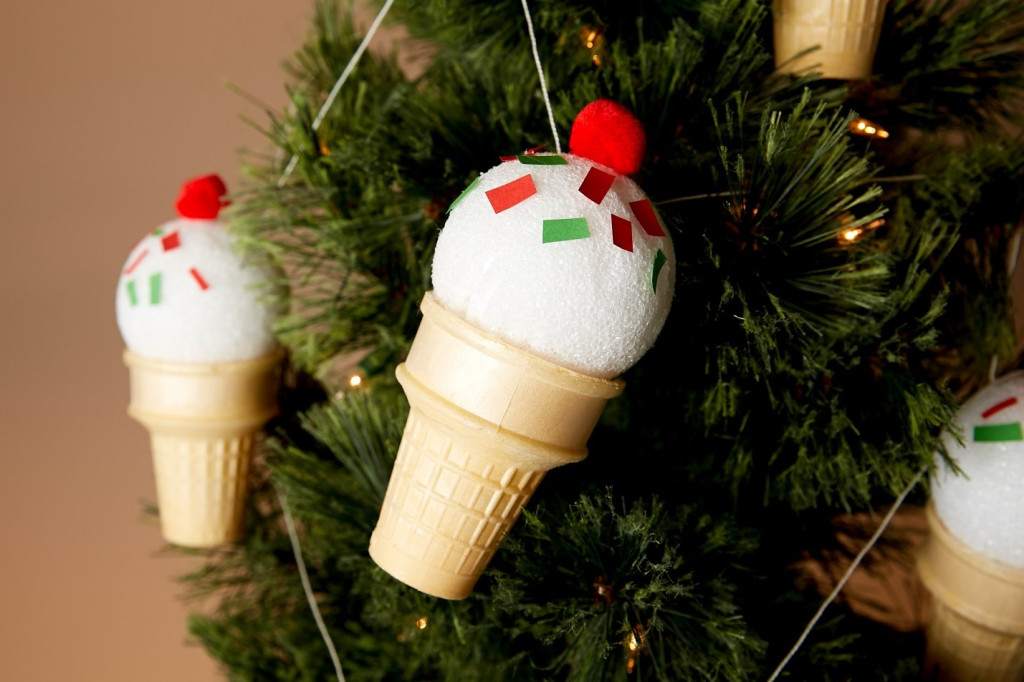
Cut “sprinkles” from your red and green construction paper. You can use your glue stick to coat one side of your sprinkles and paste them all over your “ice cream.” When all your sprinkles are set, add the pompom cherry on top of your cones using your hot glue gun and then affix the ice cream scoops to the string in the marked spots with the glue gun. When all the cones have been taped on, all that’s left to do is hang your new garland in your favorite spot.
If you love crafting and are looking for more Joyful ideas, connect with us through our e-newsletter, and share your ice cream cone photos with us on Facebook and Instagram by tagging @JoyConeCo!
Top
Recent Comments